It is easy to see why epoxy resin flooring is a popular choice for small business owners: it’s durable and can cope with even the most demanding environments—plus it’s good looking and easy to install, so what’s not to love?
If you’re thinking of installing epoxy flooring in your small business, you already know how it can transform the presentation and provide benefits: nonslip, antimicrobial, and seamless surface. In addition, it can be installed in record time. Read on for our top tips to achieve long-lasting floor perfection.
Understanding the basics
We know that the owners of small businesses wear many hats. From invoicing to insurance and marketing to maintenance, you oversee it all. An epoxy floor can take away some of the hard work required for cleaning and maintaining your property—and installation is easy to do yourself, saving a call to the experts.
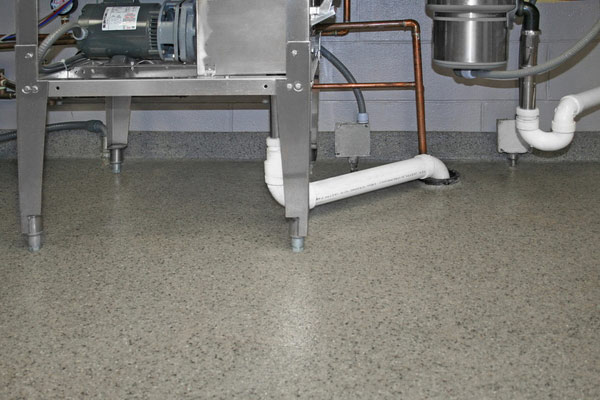
Before installing epoxy flooring, it is important to know the basics. The two main components in this flooring type are resin and hardeners, which combine to form a rigid material that bonds with the substrate. Once cured, an Everlast® Epoxy Floor provides a nonporous, high-gloss, easy-to-clean floor that requires very little laborious maintenance.
Interested in seeing high quality Epoxy flooring up close? Get our FREE sample pack today!

Getting started
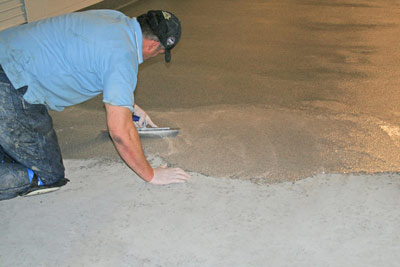
Everlast® Epoxy Flooring is designed to be applied by hand trowel over most existing floors, including concrete, and only minor surface preparation is required.
The substrate needs to be clean and dry. We also recommend that the existing floor be lightly sanded to ensure a strong bond. By scuffing the floor in this way, you’ll remove any embedded dirt and debris and create a rough surface for the epoxy to adhere to. Remember: good preparation is key to achieving a flawless finish!
Unlike some brands of epoxy resin floors, Everlast® Epoxy flooring does not require a primer or bond coat (unless you are installing over a wood substrate), which will save you time and money. We wanted to keep installation simple, and our unique formula offers a one-step application that does just that.
Check the temperature
It’s important to install your epoxy flooring in the correct temperatures, with a concrete surface temperature between 55°F and 85°F and relative humidity below 80% for a minimum of 48 hours before installation and until cured.
To achieve the best results, install your Everlast® Epoxy floor when the surface temperature is higher than 65°F and do not install Everlast® Epoxy floor when the surface temperature is below 55°F.
No special tools required
Everlast® Epoxy requires no expensive installation tools, but we do recommend having the following supplies on hand to make the job even easier:
- A clean 5-gallon bucket
- Xylene for cleaning tools (use in a well-ventilated area)
- A rust-free 4” x 16” steel finishing trowel
- A 6” x 4” x 3” inside cover base tool to apply a 4” cove base, or a 6” x 6” x 3” inside cover base tool to apply a 6” cove base. Either sized tool should have a 1” radius.
- A gauge trowel for the cove base and an inside corner trowel
- Mixing drill and “egg beater” paddle
For your comfort and safety, we advise that you wear latex gloves when handling the epoxy and safety goggles when applying the resin. Kneepads and dust masks are also advisable.
Apply the cove base
Now you’re ready to apply the cove base to your chosen height, using the gauge tool. Mark the area with painter’s tape and leave a little excess where the wall meets the floor to create the cove, and finish with a cove trowel for a smooth finish. Remove the tape and use the gauging trowel along the top edge for a crisp finish.
Pour the epoxy resin
Mix the resin and aggregate in the 5-gallon bucket, according to our detailed instructions, and pour into a line across the middle of the floor. Pour the entire mixture to avoid it hardening in the bucket and spread evenly with your finish trowel.
A halogen light pointed directly at the floor can help you to spot any ridges, marks, or imperfections—remember, epoxy does not self-level, so you’ll need to iron out any blemishes now!
Once you are happy with the finish, you can take a well-earned break while your new floor cures.
Achieve a high-gloss finish for a perfect floor
Twenty-four hours after the flooring is installed, apply a clear coat of Everlast® Stay-Clean Sealant to give it a glossy, light-reflective shine. Your new floor is now ready for business! For full instructions on how to install an epoxy floor over different substrates, please visit our installation page where you can download full details. You can also view our Do-It-Yourself video guide to installing epoxy flooring for more tips.
Interested in seeing high quality Epoxy flooring up close? Get our FREE sample pack today!