Free Sample
GET MY FREE SAMPLE
for commercial use only*
No Obligation Quote
Call (800) 708-9870
REQUEST A QUOTE
Floor Preparation Guidelines
Do not begin installation until substrates have been properly prepared.
Clean Substrate
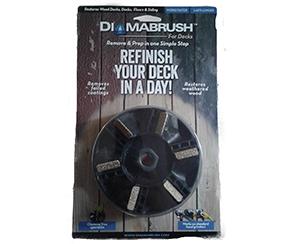
The substrate shall be clean, dry and sound. Remove dust, laitance, grease, curing compounds, waxes, foreign particles and any previously applied potentially incompatible coatings by scarifying, chipping, wire brushing, acid etching, pressure washing or by using a Diamabrush. If pressure washing or any other liquid method is used for preparation, substrate should be fully rinsed, squeeze-dry mopped and allowed to completely dry.
Moisture Content / Hydrostatic Pressure
Concrete hydrostatic, capillary or moisture pressure must be no greater than 3.0 lbs. / 1000 sf / 24 hours. Substrates in contact with the ground must have a properly installed, functioning and effective vapor barrier to help prevent potential problems resulting from hydrostatic, capillary or moisture vapor emission. Concrete must contain less than 3% moisture when tested per ASTM D1864.
Surface Temperature
Maintain minimum concrete surface temperature between 55° and 85° F., and relative humidity below 80% for a minimum of 48 hours before, during , and after installation, or until cured. Surface temperature must be 5° F. Above dew point.
Acceptance of Substrate
Beginning work usually constitutes your acceptance of substrate. If substrate preparation is the responsibility of another sub-contractor, notify Architect/Contractor/Owner/Customer of unsatisfactory preparation before proceeding.
Positive Drainage
Contractor is to provide positive drainage at floor drains, if necessary, prior to installation of Everlast® Floor. Everlast® Floor is a coating and as such it will not correct slopeage to drains.
Floor Drains
Floor drains shall be set no higher than ⅛ inch (4 mm) above slab. When there are existing drains, remove some of the substrate away from the drain. Make about a 1 inch deep and 1 inch wide void around the drain. Fill this in with the cove base material, before installing the floor. Don't fill the void up to the top, leave out an ⅛ inch space from the top of the drain to allow for a seamless floor. The cove base material is used as a filler. This will allow there to be a better bond around the drain than there usually is with tile, wood or concrete.
Floor Sinks
Floor sinks shall be set in accordance with local codes and regulations.
Gap Between Floor and Wall Sheathing
Gaps between wall sheathing and substrate shall be filled prior to flooring commencement per flooring manufacturer's requirements.
FRP
FRP and any other wall finish should terminate with a J-mould or other trim at desired height above finish floor.
Wall Finishes
Everlast® cove base is no greater than 3/16" thick, so if the wall where you plan to install cove base is recessed deeper than that, fill it in advance with wallboard, cement board, or plywood.
Concrete
New concrete must cure for at least 28 days at 70°F (21°C), and have been free from water for at least 7 days. Older floors should be scarified and thoroughly cleaned or prepared using a Diamabrush. If badly cracked, crumbling, punky or deeply contaminated with oil or fat, a new concrete topping of proper thickness and strength should be installed. Swollen areas should be chipped out and any cracks, spalls, joints or other depressions filled with Everlast® Epoxy Underlayment. The concrete should be at least 2500 psi. Concrete hydrostatic, capillary or moisture pressure must be no greater than 3.0 lbs./ 1000 sf / 24 hours.
In some cases it is necessary to create cut joints to allow for movement in the concrete slab. While Everlast® Floor has more flexibility than other epoxy floors, it should not be used to bridge isolation joints or expansion joints. In most cases due to it's tough flexibility Everlast® Floor can sucessfully bridge control joints, sometimes though an epoxy crack suppressant membrane (available from Everlast® Epoxy) or a cut joint is needed. See our Recommended Tools Page for our recommended cut joint fillers.
Wood
The minimum requirement for hardwood floor rigidity (deflection rate) is L/480. If movement is detected or there are visible cracks, install a layer of concrete board or plywood over the hardwood floor. See below instructions to further prep the plywood or cement board.
Plywood
Plywood floors shall consist of 2 layers of at least ⅝ inch (16 mm) material with offsetting joints, and screwed (nailing not acceptable) every 16 inches (406 mm) to the joists. Alternatively, install a layer of ½ inch (12 mm) concrete backer board over the plywood, using a quality sub-floor adhesive and deck screws.
Seams in the plywood or concrete backer board shall be treated with fibre tape and Everlast® Crack Filler. Procedures are: Step 1 Fill the seam with Everlast® Crack Filler using a trowel - be sure to fill the void and extend the paste at least 4 inches on either side of the seam. Step 2 embed the fibre tabe into the paste centered over the seam. Step 3 Spread more of the paste over the fibre tape with a finish trowel, be sure that the fibre tape remains flat as stray strands or wrinkles will make installing the floor difficult. Taper the paste our at least 6 inches on either side of the Everlast Crack Filler paste.
All plywood and concrete board subfloors are to be treated with a blend of 90% Everlast Hi-Grip Primer and 10% Xylene, and allowed to cure for 12 hours prior to installing Everlast® Floor.
Concrete Board
The same preparation as with plywood..
Vinyl Tile
Thoroughly clean to eliminate wax buildup. Loose tiles and adhesive shall be removed and areas patched with Everlast® Epoxy Underlayment. Surface area shall be prepared with a Diamabrush or with 36 grit sandpaper.
Asbestos / Asphalt Glue
We always recommend removing all adhesives with a Diamabrush. But there are health and legal concerns whenever dealing with asbestos, which we are not qualified to advise on, so we recommend that you consult your local environmental health authorities. If adhesive cannot be completely removed, then it is necessary to prime floor with Everlast® Hi-Grip Primer, and allow to cure for 12 hours prior to installing Everlast® Floor. Priming over the adhesive will not guarantee the longevity of your new floor, but it will greatly increase the chances. Priming the floor also will help prevent the asphalt from leaching through and "staining" the Everlast® Floor.
Quarry / Ceramic Tile
Tile and grout shall be thoroughly cleaned. Loose tile shall be removed and filled in with Everlast® Epoxy Underlayment. Surface of the tile shall be scratched with a diamond grinder or a Diamabrush to remove the glaze.
Steel Decks
Clean free from oil, grease, rust and loose scale. The deck shall be wiped with denatured alcohol. Allow deck to dry before application of flooring.
Radiant Heating System
Everlast Floor can be installed over a radiant heating system if the following 3 conditions are met:
a) The wires are not exposed directly to the floor material. They must be covered by the substrate.
b) The radiant heat system is not more than 140°F at the source.
c) Moisture vapor transmission reading must be 3lbs or less. If the subfloor has a hydronic (liquid) system then, while the system is running, use the calcium chloride test method to determine the moisture vapor emission rate.
We recommend using a Diamabrush to prepare concrete, Vinyl Tile (VCT), Quarry / Ceramic Tile, and to remove adhesives
If attempting to remove asbestos, there are health and legal concerns whenever dealing with asbestos, which we are not qualified to advise on, so we recommend that you consult your local envirnomental health authorities.
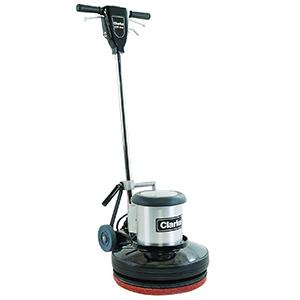
The Home Depot Tool Rental Center- Concrete Floor Preparation
Diamabrush Hand Tools for Pros - The Home Depot
Video: Diamabrush Removal Tool Training
Video: Diamabrush Hand Tools
Diamabrush tools are also available for sale at Amazon. Here are some links to get you started.
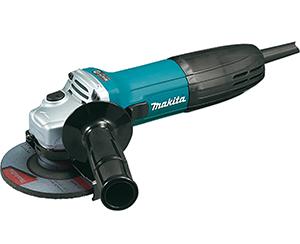
4.5" Hand Grinder Set from Amazon

7" Hand Grinder Set from Amazon
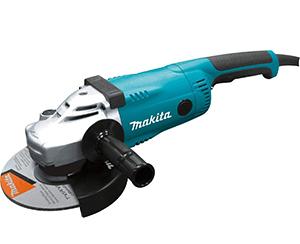
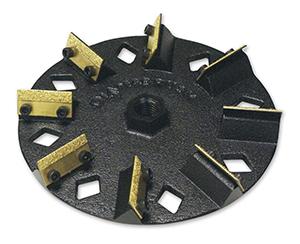
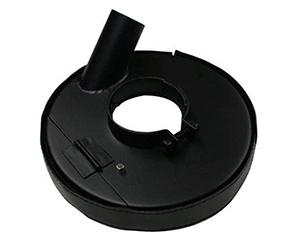

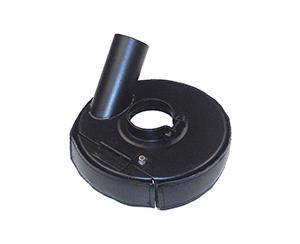
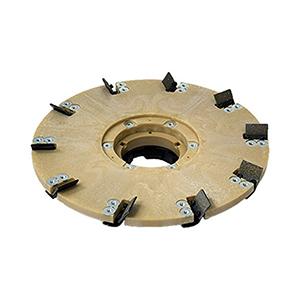
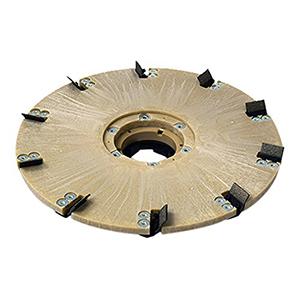
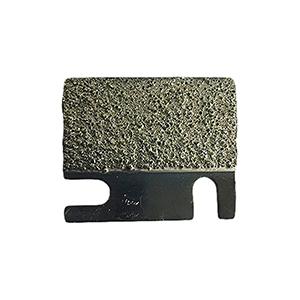
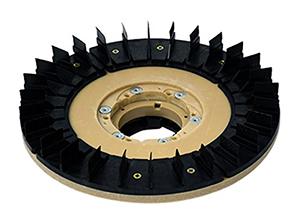
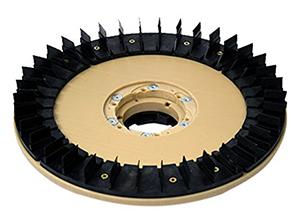
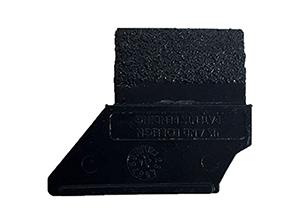
Diamabrush Floor Preparation Tools
Before buying replacement blades for Diamabrush the Concrete Prep Plus Tool recommend first making sure that either a new head or the larger set
of replacment isn't cheaper - as the prices fluctuate.

Check for any moisture problems with the concrete or tile. New concrete must cure for at least 28 days at 70°F (21°C), and have been free from water
for at least 7 days. Tile or Concrete hydrostatic, capillary or moisture pressure must be no greater than 3.0 lbs./ 1000 sf / 24 hours.
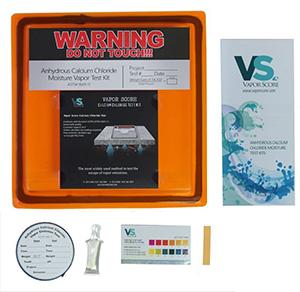

Calcium Chloride Moisture Content Test
Calcium chloride tests should be conducted to determine if the concrete is sufficiently dry for the installation
of Everlast® Floor. The calcium chloride tests should be conducted in accordance with the latest edition of ASTM F 1869, Standard Test Method for Measuring Vapor Emission Rate of Concrete Subfloor Using Anhydrous Calcium Chloride. When running a calcium chloride test, it is important to remove any grease, oil, curing agents, etc. so accurate readings can be obtained. Concrete hydrostatic, capillary or moisture pressure must be no greater than 3.0 lbs./1000 sf/24 hours.
Gram Scale
Use for weighing the calcium chloride test kits before and after the test.